Windshield Wiper Tech and Rivian R1T and R1S Install Guide
Autumn is here and that means the rain or snow have probably started to fall wherever you live. Depending on how long you’ve had your electric truck, that may mean it’s time to replace your wiper blades, which can dry out over the warm summer months. Even if your blades are in good shape, you can still often gain a significant amount of wiper performance just by switching to the right blade.
Given the newness of many electric trucks, you may have a difficult time locating a replacement wiper blade at your local auto parts store. While the F-150 LightningEV shares its blades with the regular F-150, Rivian R1T and R1S blades don’t exist yet in many auto part store catalogs. Just because a vehicle like a Rivian isn’t listed in the fitment catalog at your local shop doesn’t mean the parts aren’t there. You just need to know where they are and how to install them.
Choose a wiper blade type
There are a multitude of wiper blade manufacturers. Wiper blade construction itself, though, breaks down into three styles - conventional, beam, and hybrid.
-
Conventional wiper blades are your more traditional blade construction, which consist of a pivoting metal support and metal-lines rubber blade.
-
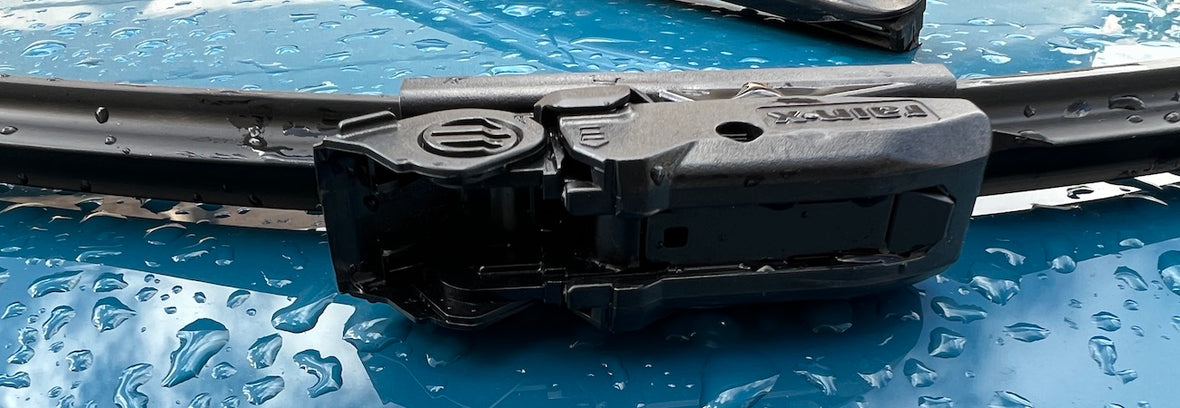
Beam wiper blades were introduced a few decades ago. Instead of using a metal structure to mold the blade to your window, the blades themselves are curved. This type of blade often offers a superior wipe and is not susceptible to the same sort of snow build-up that occurs on the frame of a conventional blade. We strongly recommend this style of blade due to its tight and continuous cling against the windshield.
-
Hybrid blades, as the name would suggest, are a combination of the two styles listed above. They have a simple metal frame that reinforces a pre-curved blade.
Choose a blade material
Wiper blades have traditionally been made of rubber. This time-tested approach is still in use by many OEMs and aftermarket suppliers because it works well and is cost effective too. There are now also other types of synthetic materials available in place of rubber. One of the most common materials you will see is silicone.
Which is right for you? The answer is surprisingly personal. Rubber blades are more affordable. Silicone blades last longer, but come at a costly premium. Regardless of which material you choose, it is highly advisable to buy from a reputable brand, as (from our experience) some of the cheaper no-name makers tend to not last as long.
Choose a manufacturer and size
|

|
Install the blades
Remove the existing blades
| 1. You’ve probably noticed that the windshield wiper blades on your Rivian R1 are recessed below the hoodline. To access them, you will need to press the gear-shaped icon in your main navigation screen. You’ll then go to the “Vehicle” tab and select the “Wiper service” toggle. This will cause the windshield wipers to wipe halfway up your windshield and stay. |
 
|
| 2. Pull out the arm of the wiper you wish to replace. |  |
| 3. Compare your new blade to the one being replaced to confirm that they are the same size. | |
| 4. Remove the existing blade—the OEM wiper blades from Rivian have a little tab that must be depressed. |  |
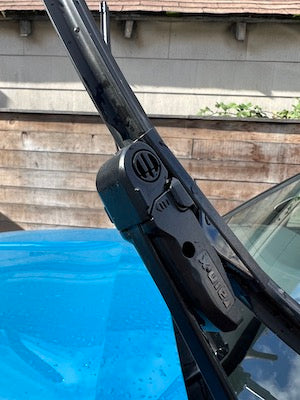
| While pressing this tab, you will then pull the blade down following the same line as the wiper arm. The blade should slide inward toward the windshield leaving you with a hook at the end of the wiper arm. Before fully removing the blade, take note of how the wiper arm “hook” wraps around the plastic clip on the blade. |  |
| Confirm the blade connector style - It’s important to verify that your new blades utilize the hook style of attachment, not a peg. You can identify this type of attachment fairly easily, as it should be long with a rounded end that the wiper arm “hook” will slide over. If you have any doubts though, this information should be available in the instructions that come with your wiper blades. |  |
Install the new blade -
|
1. To install the new blade, simply position it inline with the wiper arm so that the open side of the wiper arm hook begins to slide over the clip. Then, push the blade in parallel with the arm and away from the windshield. (You may or may not hear a click when it is in place.) |

|
| 2. Close any remaining fasteners to lock the blade in place. Our blades have a little clasp that rotates and clicks into place. |  |
| 3. Repeat the procedure on the opposite side |
| 1. Once both blades are installed and back in contact with the windshield you’ll want to hop back in the car. Then, on the center touchscreen you will select the “Wiper service” toggle one more time. | |
| 2. The vehicle will present you with a warning confirming that you have followed step number 8 above. If you have done so, press the “Wipers on glass” button. |  |
| 3. Your wipers may or may not fall back into their original place upon pressing this button. If they don’t, simply turn the truck on by pressing the brake pedal. Then, press the wiper button at the end of the left-hand steering column stalk. (No need to press and hold.) |
That’s it! Your new blades are in place and you’re ready to face whatever nature is going to throw at you. Even better, your new blades will perform better than stock and should last for several years. Enjoy!


