Megawatt™ Performance Rock Sliders with Step for R1 Installation Instructions
Please read all warnings and disclaimers prior to installing your Megawatt™ Performance Rock Sliders.
Thank You
Thank you for purchasing the highest quality, most robust rock sliders available for your Rivian! Doing so is a great step toward customizing your vehicle and protecting it from the harsh environment of off-road driving.
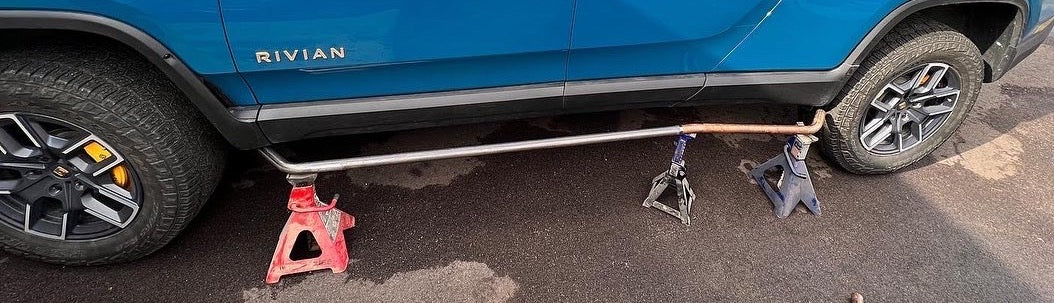
Installation of your Megawatt™ Performance Rock Sliders is a fairly straightforward process. With a little patience and the help of a friend, (or pair of jacks), the process can be done using simple hand tools.
Preparation:
Included parts:
- 2 x Rock sliders
- 1 x TP55 socket
- Thread locker
Required tools:
- Floor jack, jack stands, or a 5 gallon bucket
- Screwdriver and/or pick for releasing body panel clips
- T15 torx screw driver
- Ratchet
- 10 mm socket
- 17 mm socket
- TP55 socket
- Socket extension
- Torque wrench
Installation:
Elevate the vehicle
- Park the vehicle on a level surface
- Set the vehicle in its highest suspension setting (under "off-road")
Remove the underbody plastics
- Starting at the front of the vehicle, unscrew the T15 torx screws from the underside plastics located just behind the front wheel.
- Remove the 10mm bolts holding the front plastics in place
-
Carefully pry the front plastics off of the vehicle.
Note: The underbody plastics you will be removing are all attached via metal expansion clips, (as well as any screws or bolts). These can be tricky to remove. To do so, carefully, but forcefully pry the panel away from the vehicle. If the clips do not release on their own, a second screw driver or pick can help help compress the clip enough to release it. (An L-shaped pick or screwdriver can be useful for unclasping the back side of the clips). It is important to be patient during the process to avoid breaking the plastic which the clips are attached to.
- Using a socket extension, remove the 10mm bolt on the plastic panel located under the vehicle and ahead of the rear wheel.
- Carefully pry loose the rear plastic.
- Beginning from either side, slowly, but forcefully pry the center plastic panel located under the vehicle.
Install the rock sliders
Loosen/Remove the underbody bolts
- Removing the plastics will expose 7 x 17mm bolts that hold the underbody shield or plastic underbody cover. Starting from the front, you will remove bolts number: 1, 2, 6, 7, 10, and 11.
- Next, you will remove the large TP55 bolts. Starting from the front, loosen (but do not remove) the following bolts until they are just barely screwed in (1 or 2 turns) bolts:
- R1T: 3, 4, 5, 6, 8, 9.
- R1S: 3, 4, 5, 6, 7
Mount the Main Rail
-
Starting with the sliders elevated (either balancing on a jack(s), a 5-gallon bucket, or supported by a friend): Slide the bolt heads into the slotted mounting points on the main slider rail.
Note: Our sliders offer full-length protection and were designed to retain all factory hardware. You may need to roll them slightly by lifting the outside edge in order to clear the 2 medium-sized bolts at the front of the rail. If you absolutely cannot clear these bolts, they can also be removed and left that way.
Bolt Everything Up
- Once the sliders are hanging by the still loose TP55 bolts, align the three mounting flanges with the corresponding threads in the truck.
-
Without thread-locker partially thread the 17mm bolts into place by hand. This will ensure proper alignment.
Tip: If you are struggling to get a bolt to align, ensure the TP55 bolts are as loose as possible. Then try tightening the difficult bolt first before you proceed on to others.
- Begin tightening the TP55 bolts (these bolts do not require thread-locker).
- Start at one end
- Tighten the bolt about half way
- Tighten the opposite end about half way
- Work your way inward alternating sides
-
Repeat this process until all bolts are snug, but not tight
- One at a time, working at alternating ends and moving inward, revisit the 17mm bolts. You will:
- Remove the bolt
- Apply a small amount of thread-locker to the threads
- Screw the bolt back in until it is snug, but not tight.
Torque Everything Down
- Continue to tighten the fasteners by alternating ends and working your way in. Be sure to re-check the originally tightened bolts once you get to the end as the rail will continue to snug up against the truck.
- Torque the bolts to the following specifications:
- Black bracket bolts: 30 ft/lbs
- TP55 bolts: 85 ft lbs
Celebrate
Congratulations! You’ve just installed the worlds most well-built Rivian rock slider and are ready to go offroad. Let us know how your experience was and share your adventures by posting and tagging us on social media. Enjoy!